
If you’re working toward getting your horse soft and supple throughout his body with the goal of achieving collection at all three gaits, the Intermediate exercise Bending With Vertical is an important stepping stone in your training program. I introduce this exercise toward the end of the Intermediate Series because it’s important that your horse is soft laterally before beginning it. Each of the exercises that lead up to it prepare the horse to understand what you’re asking him to do and to execute the maneuver.

Up until this point in the Method, you’ll only have worked on vertical flexion while the horse was completely straight from his nose to his tail. You’ll have done this in exercises such as Vertical Flexion at the Standstill and Vertical Flexion at the Walk and Trot. Bending With Vertical will start to teach the horse how to tuck his nose in and soften while his head and neck are bent, which will help you get a lot more control of his poll.
What You’re Looking For
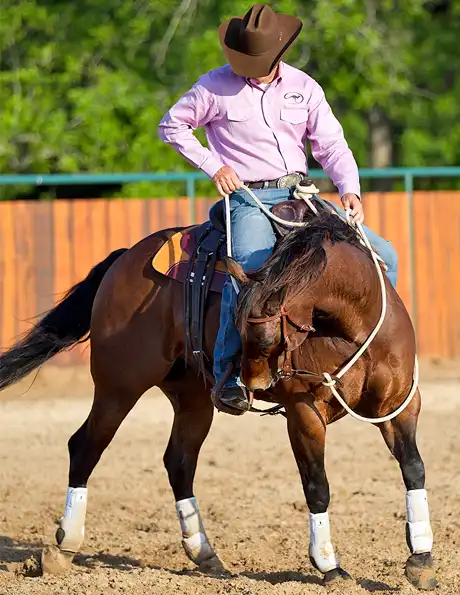
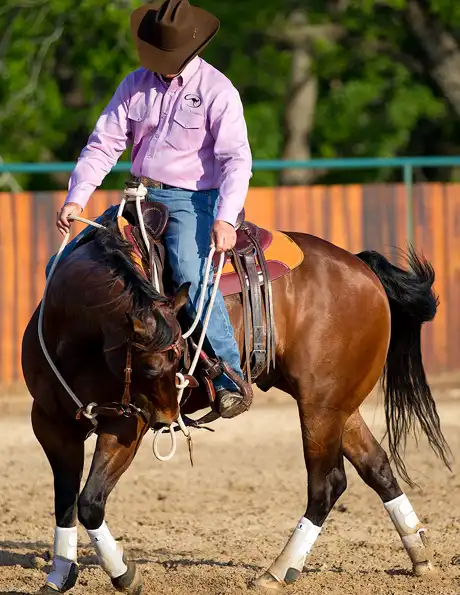
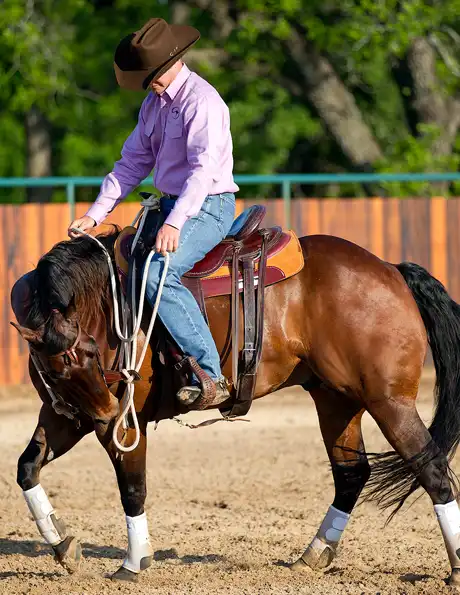
The goal of this exercise is to get the horse to walk forward and around in a small circle while bending around your inside leg and keeping his nose tipped in laterally as well as vertically. Ideally, his nose should be softening toward the point of his shoulder. The horse should be very soft and supple through his whole body from his nose to his tail with his hind end stepping up underneath him and his shoulders following his nose on the circle.
Why It’s Important to Take This Next Step
Practicing this exercise will help when you start doing circles and spins and asking the horse to collect because he’s going to have to tuck his nose in and shape his body laterally at the same time. If there’s any stiffness in the horse, it is going to show up dramatically when you start doing more advanced maneuvers. Teaching Stage
1. Walk the horse forward on a loose rein.
2. To bend the horse to the left, slide your left hand down the rein and pull it up to your hip. At the same time, roll your inside spur to soften his ribcage. Remember that your inside hand and inside leg go on together and off together.
Whenever the horse loses forward motion, get it back by pressing or rolling your spur in the middle of his ribcage. In all reality, if the horse is having any trouble at all with Bending at the Walk, he is not ready for this exercise. The horse needs to be able to walk forward and around, with his nose bent to your toe, keeping that shape by himself on a loose rein. If he can’t do that, you need to go back and get better at the basics.
To start, cue the horse to do the Fundamentals exercise Bending at the Walk. If you’re bending the horse to the left, use your left rein and left leg.
3. As the horse is bending, slide your right hand down on the outside rein about 5 or 6 inches past the middle of the reins.
You don’t want to slide your outside hand (in this case, your right hand) too far down the rein because you want to allow enough room for the horse to bend his head around. If you slide your hand down too far, it will put him in too much of a bind and he won’t be able to go forward.
4. Then pick up on both reins, and at the same time, press the middle of the horse’s ribcage with your inside leg.
So you’ll be bringing your inside (left) hand towards your left hip to bend the horse’s nose and you’ll also be bringing your outside (right) hand towards your right hip to soften his poll vertically. Ideally, your hands should be somewhere between your knees and your hips. The goal is to have the horse soften toward the point of his shoulder, which means he won’t be bending all the way around to your toe. Think of his head bending to a 45-degree angle.
When done correctly, your hands should be somewhere between your knees and your hips. If you’re pulling to your belly button, you’re not doing it correctly.
5. Your outside leg should just hang by the horse’s side, but if you feel you are losing forward movement, press with your outside leg to encourage forward movement as well.
If the horse doesn’t respond to your inside leg pressure, roll your spur up his side or tap him behind your leg with a dressage whip to create more forward movement and bend. Your hands and legs should work together like a pulley system. When you pick up on the reins, your inside leg should press the horse’s ribcage to encourage him to bend his body, and when you release the reins, you should release your leg as well—on together, off together. Make sure that he continues walking forward and around the entire time. Most of the time you will mainly use your inside leg to encourage your horse to bend his ribcage around your inside leg. However, if you need to, don’t be afraid to use your outside leg. You can use your outside leg to either encourage more forward movement or to correct the horse if he is drifting out with his shoulder.
6. As soon as the horse softens to the bit by bending his nose toward your toe laterally and tucking his head in vertically, instantly drop both hands to your kneecaps and release your leg.
The horse should remain walking the circle, keeping the shape by himself with slack in the reins. Pull in the direction of your hips and when the horse softens laterally and vertically, drop both hands back to your kneecaps. When applying the spur, turn your toe out and roll your heel up. As a general rule, I like to roll with the spur because it lifts the horse’s ribcage up a little more and he doesn’t resent it as much as when you stab or poke him with the spur. You will be able to accomplish this exercise much more effectively if you are wearing spurs. You can do the exercise without spurs, but it may take a little bit longer to get the horse to understand and you’ll have to be more conscious of maintaining forward energy because he will probably be lazier.
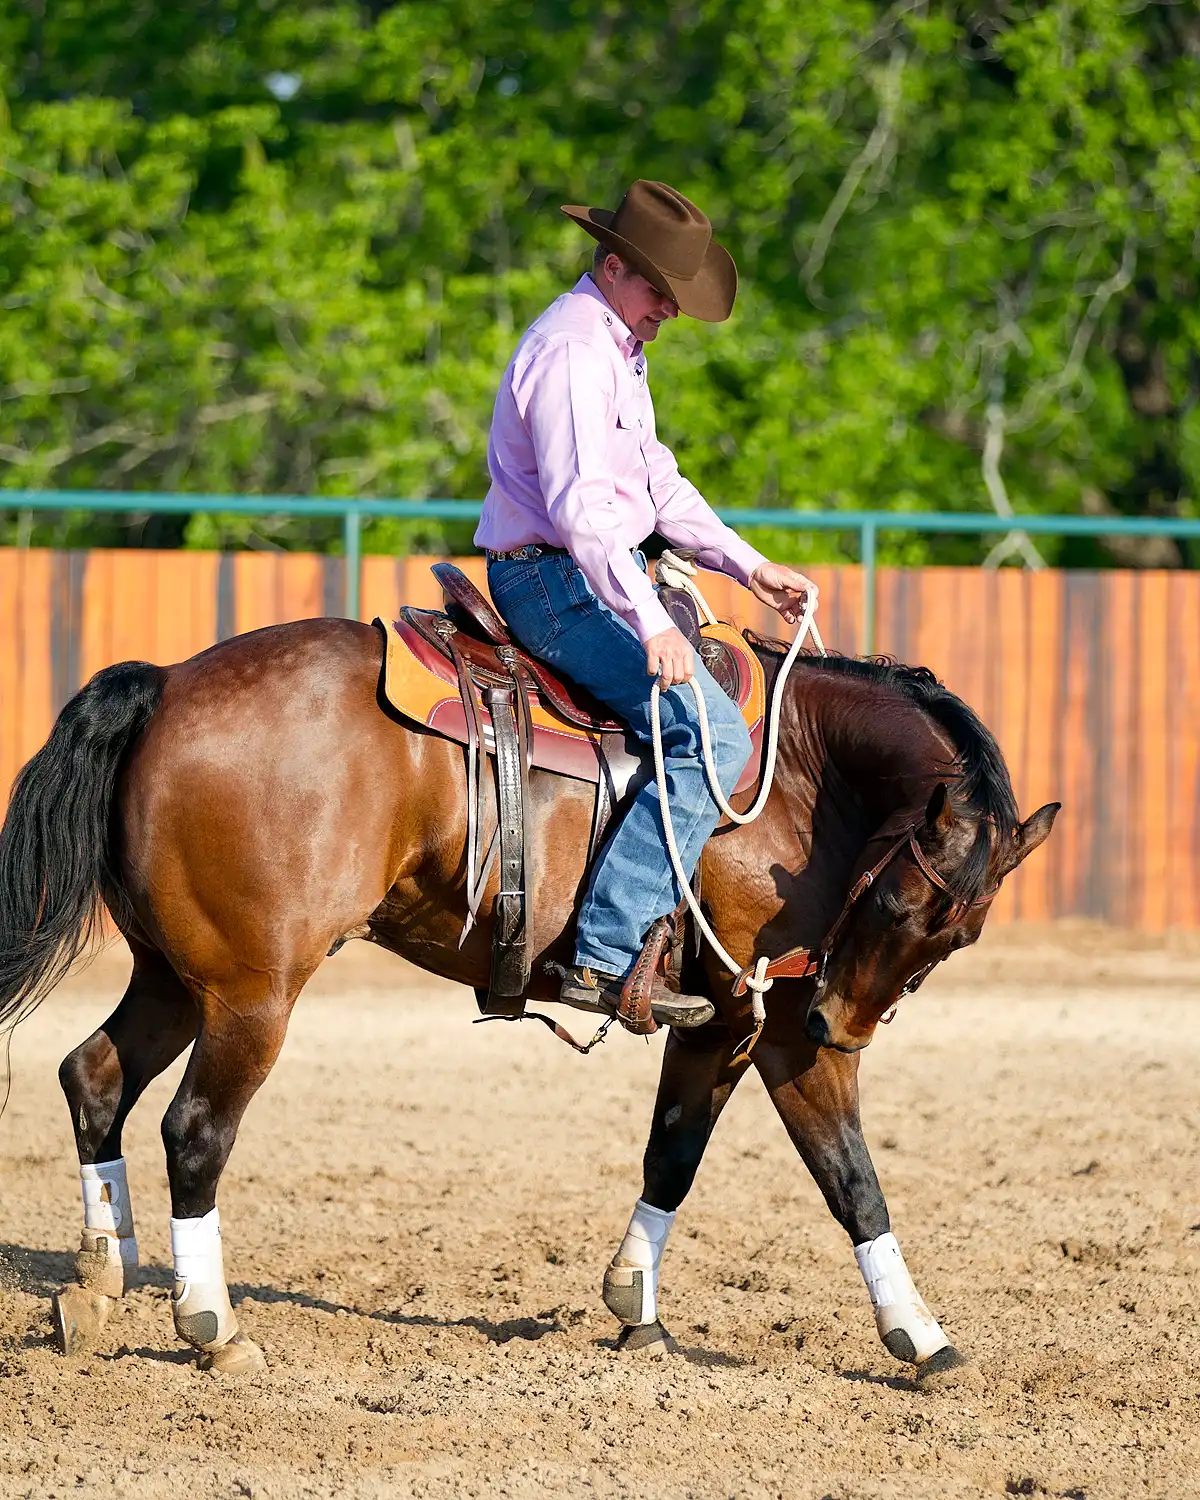
7. The horse should continue to walk a small circle with his head and neck bent to the inside and his nose tucked in vertically. If he starts to straighten his head out or flip his nose up, bring your hands back to your hips and apply leg pressure. You’re looking for the horse to tuck his nose in toward his shoulder by bending his head and neck and softening at the poll. When he does, release all pressure by dropping your hands to your kneecaps and releasing your leg. The end result will be that you can release your hands to your knees and the horse will keep the shape by himself and continue to walk forward and around. Walk three to four circles, pulling and releasing the reins as needed.
If the horse instantly snaps his head back when you release the reins, he’s not really soft. He’s only half as soft as you think he is, and he’s only keeping his head and neck bent because you’re making him. You want the horse to eventually keep his head bent by himself because that tells you he’s really comfortable in that position. Remember, your hands and inside leg work together like a pulley system—on together, off together, on together, off together. Eventually, the horse will realize that when you release your hands and inside leg, he’s not supposed to straighten his head and neck out.
Every time you feel the horse soften vertically, drop both of your hands to your kneecaps and release your leg. The horse should stay in position.
8. As the horse is circling, he should have bend through his whole body from his head to his tail.
His hindquarters should be stepping up underneath himself and his shoulder should be following his nose into the circle. You can put your inside leg slightly back and your outside leg slightly forward to encourage his body to arc around the circle.
9. After three or four circles, drop the reins completely and let the horse walk out on a loose rein. Let him walk straight for 40 to 50 feet, and then bend him in the other direction.
Don’t stay in the bending circle too long because the horse will start to get frustrated and have sticky feet. When you’ve done three or four circles and he feels soft and light in your hands, drop the reins completely and let him walk out 40 to 50 feet before bending him the other way.
10. Once the horse understands the exercise at the walk, start making it into a transition. Trot the horse off on a loose rein, then sit, sit, sit and slide your hands down the reins as you apply your inside leg. Pull the outside rein up to your hip and ask him to bend and soften vertically at the walk. Then let him out and trot off again. Do these transitions at the trot and canter, always bending him back down to a walk.
Now that you have more body control of your horse, you can ask him to shape himself around your inside leg by moving his shoulders and ribcage over. With repetition, you’ll notice that the horse will automatically move his shoulders away as soon as you tip his nose in the direction of the bend.
When the horse understands the concept of the exercise, you can practice transitions with it. Trot or canter him off and then sit down in the saddle and slide your hands down the reins to take him into a bending circle.
Get the Help You Need
Watch Clinton teach this lesson in the Intermediate Series. In the lesson, Clinton not only shows how to teach the exercise to a horse that’s never done it before, but he also covers common mistakes and problems to be aware of and crucial troubleshooting and success tips.

Master Your horsemanship Skills
Like these tips? Join the No Worries Club and hone your skills with thousands of hours of Clinton’s easy, step-by-step method horse training videos.