Tips to perfect one of the staple exercises of the Method
A horse can never be too soft or supple. I have never had someone ask me what they do with a horse that’s too soft or moves his body too well. But, I do get tons of questions about horses that are stiff and lean on the bit. The secret to a soft horse is gaining control of the five body parts – the head and neck, poll, shoulders, ribcage and hindquarters. One of the ways we teach horses to be soft in the head and neck is with lateral flexion.
We first introduce lateral flexion to the horse in the Fundamentals Series with the groundwork exercise Flexing the Head and Neck. Teaching the horse to flex on the ground first makes teaching him the same concept under saddle much easier. If your horse can’t flex and be soft and supple on the ground, he’s not going to flex and be light under saddle either. Lateral flexion is the key to vertical flexion – teaching the horse to collect.
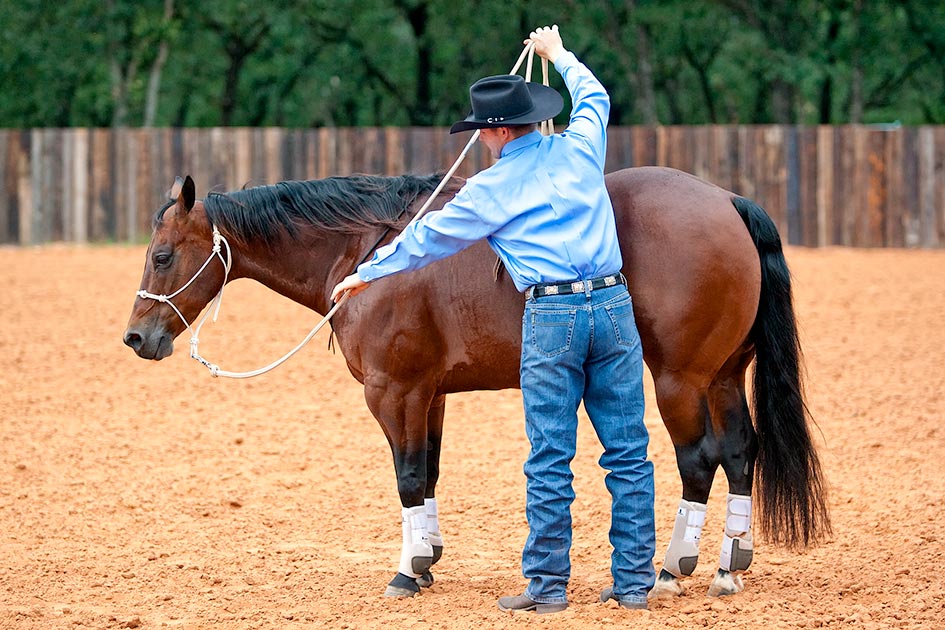
No matter which stage of flexing you are working on, always pick up on the lead rope with steady pressure first. Steady pressure is like politely asking the horse to soften to the pressure.
Here are some tips to keep in mind as you teach your horse the exercise, or to use to brush up on your skills.
Repetition is the Key
The secret to getting a horse really light is repetition. So flex your horse every chance that you get. At the ranch, we flex the horses on each side of their body five to 10 times every single time we halter them. It acts as a friendly reminder for the horse that you do the pulling and he does the giving. It just starts the day off on the right foot. We also flex them between every sensitizing exercise. So whenever we desensitize a horse, before changing sides we step in and flex him a few times. And then when we go to put the horse away at night, right before taking the halter off, we flex him five times on each side so that it’s the last thing he remembers. The more you practice, the lighter your horse will get. Nobody ever complains that their horse is too responsive, but everybody complains that their horse is heavy, stiff and resistant.
Position Yourself for Success
When you ask the horse to flex, stand even with his flank, glue your belly button to him and hug his hindquarters. If you’re standing on the left side of the horse, hug his hindquarters with your right arm. Standing in this position will give the horse an open area to touch his belly and it’ll keep you safe. When most horses are learning the exercise, they’ll move their feet and usually step back with their inside foot. If you’re too far forward the horse could step on you.
Always Pick Up with Steady Pressure First
No matter which stage of flexing you’re working on, always pick up with steady pressure first. Steady pressure is like politely asking the horse to soften to the pressure. I’ve found through experience that if the horse doesn’t have the basic concept of flexing to steady pressure first, using driving pressure (bumping with rhythm) will only make him frustrated and confused. If you’ve taught him stage one and he’s ignoring you, then you can use driving pressure to encourage him to soften. Slide two fingers down the lead rope and pick up just enough to make contact. Then count out loud to yourself, “one thousand one.” If the horse hasn’t come around in that time, use driving pressure. Counting out loud gives the horse a split second to correct his mistake. If he doesn’t, you’re going to teach him that he isn’t allowed to lean on the halter pressure and ignore you.
Even if you know he’s not going to come around off the steady pressure, always give him that chance because if you’re consistent with asking with steady pressure and telling with driving pressure, pretty soon he’ll respond when you ask. Remember, horses will never get any lighter than the first amount of pressure that is applied. If you always ask by jerking on the halter, you’ll always have to jerk on it to get the horse to soften.
The Secret is in the Release
Horses learn from the release of pressure, not pressure itself. So the quicker you can release the lead rope and give back to the horse when he softens, the faster he’ll catch on to the lesson and the softer he’ll become. I tell people that when the horse gives, act like the rope is burning you and drop it as fast as you can. In fact, not only should you literally drop the lead rope out of your hand applying pressure, but you should create extra slack in the rope by sliding your opposite hand forward toward the horse’s neck. If you release the lead rope too slowly, most horses will drag the lead rope out of your hand, rewarding themselves. In time, this will actually make the horse stiffer and more resistant. Every horse’s greatest wish is for humans to stop pulling on them, so the release of pressure is the best motivation for a horse to get softer. But if you release slowly, there isn’t an incentive for the horse to get off that pressure any quicker.
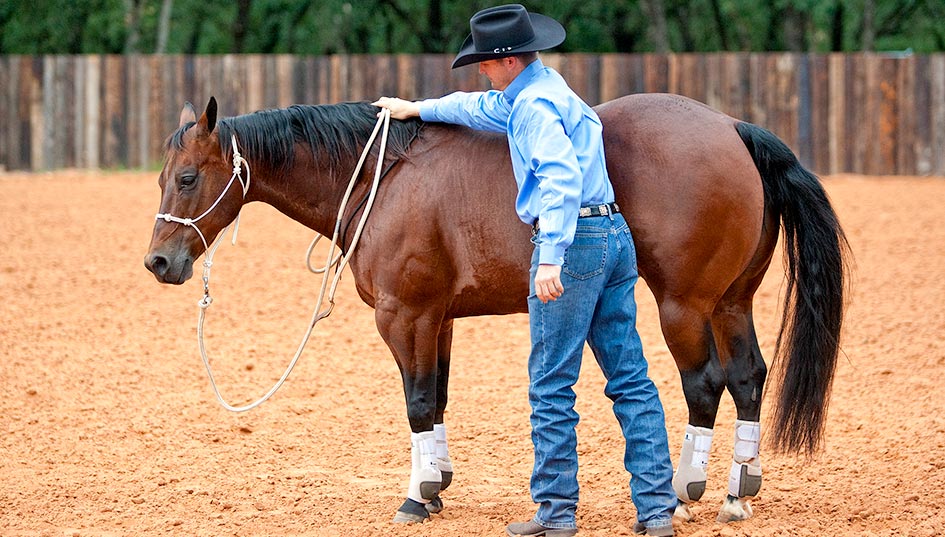
Horses learn from the release of pressure, not pressure itself. So the quicker you release the lead rope and give back to the horse when he softens, the faster he’ll catch on to the lesson and the lighter he’ll become.
Don’t Do All the Work
When you pick up on the lead rope to ask the horse to give, don’t pull the horse’s head more than of the way around to his belly. The last is his responsibility to give by himself. If you pull his head all the way around, you’ll have to make him do it every single time. Your goal is for the horse to continually put in more effort and for you to put in less effort. Eventually, as soon as you slide your hand down the rope and just make contact with your fingertips, the horse should already be coming around to his belly.
Keep in mind that the horse may not be able to touch his belly the first day. This is especially true if he’s an older horse that’s been stiff and heavy for a long time. Your goal will be to find a starting point and then chip away at it every day. In the beginning you want to get the basic concept across to the horse: “I do the pulling, you do the giving.” Every time the horse softens a little further toward his belly, he creates a new standard for himself. He must now flex at least that good or better for the rest of his life in order to get the release. If you chip away at flexing every lesson, he will eventually be able to touch his nose to his side.
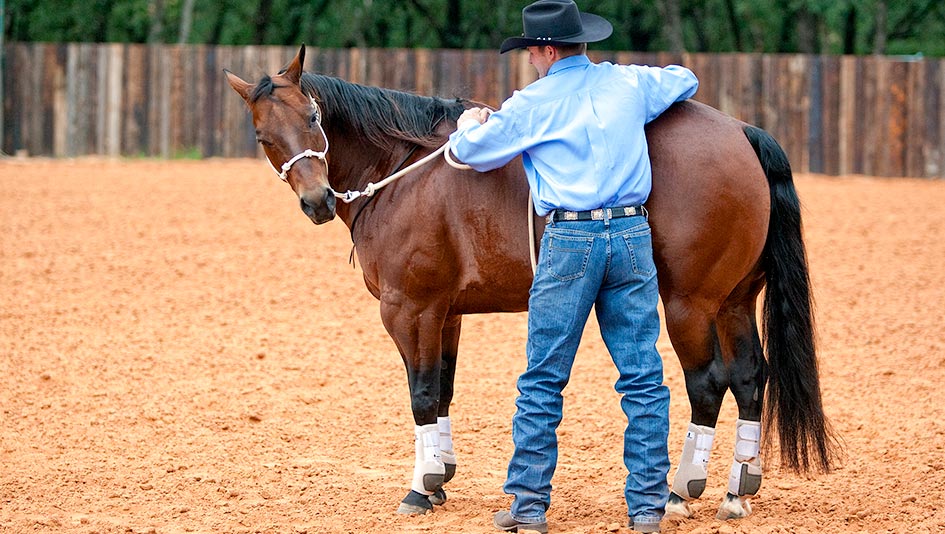
Your goal is for the horse to continually put in more effort and for you to put in less effort. So when you first pick up on the lead rope, don’t pull his head more than of the way around. It’s his responsibility to give the last.
Let the Horse Rest Between Flexes
If you give the horse a five or six second rest between each flex, it’ll give him an incentive to put in more effort the next time. He’ll quickly realize that when he softens his head and neck, he’ll get rewarded.
Teach All Four Stages of Flexing
Every exercise has two stages: the Teaching Stage and the Do it now! Stage. During the teaching stage, you’re patient and give the horse the benefit of the doubt. For example, when you first teach the horse to flex, you pick up on the lead rope, wait for him to find the answer and then release. Once the horse understands the concept and knows what he’s supposed to do, then it becomes the “Do it now stage!” In this stage, you give the horse a chance to be good, and if he doesn’t put a lot of effort into it, isn’t paying attention or doesn’t try, he’s going to feel very uncomfortable until he gives the right answer. At this stage, the focus is on making the right thing easy and the wrong thing difficult. With consistency and repetition, the horse learns to respond immediately with the right answer as soon as you ask with the lightest amount of pressure.
Understanding the “Why” Behind the Four Stages of Flexing
Stage Two: Bumping on the Halter
It’s good to teach all horses how to respond to an increased amount of pressure. Most horses’ first reaction to an increased amount of pressure (such as bumping on the halter) is to throw their head in the air and become defensive. The horse needs to realize that when you apply more pressure, the answer should be to soften and yield quicker. This will help him to use the thinking side of his brain in various situations. For example, if you take your horse somewhere such as a trail ride or a horse show, you’re probably excited; your adrenaline is up and your mind is thinking of a hundred things at once. Because of this, you may pull or kick the horse a little harder than you mean to. If he’s only accustomed to you applying a very light amount of pressure, he’s probably going to react badly. But if you have taught him how to respond to driving pressure, he’ll know what to do.
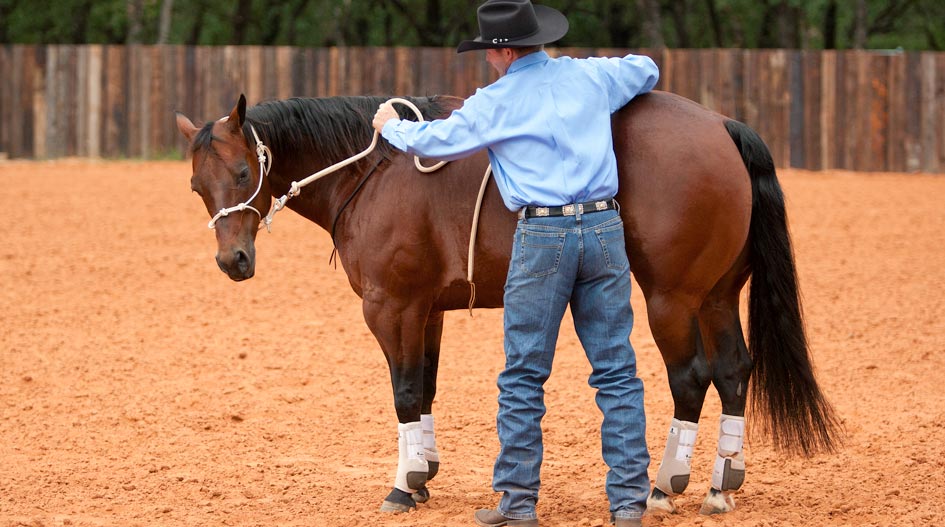
Flexing Stage Two: Bumping on the Halter
Stage Three: Poke and Flex
Flexing Stage Two works on 80 percent of horses, but for older, stiffer horses, this third technique will really get the horse light and responsive to the halter. Some horses are especially dull to the halter pressure, where you could bump on them all day long and they’ll just continue to lean against it. So by moving the driving pressure to their belly, they aren’t able to lean against it as much. Remember something, horses don’t have hard mouths, they have hard, stiff bodies. Any resistance you feel in the horse’s head or mouth is coming from his body. If you get the body soft and supple, the head and mouth will feel light. That’s why in this exercise you’ll use driving pressure on the horse’s ribcage to teach him to bend. It’s still the same concept as using driving pressure with the halter: Ask with steady pressure, then tell with driving pressure. The only difference is where the driving pressure is applied.
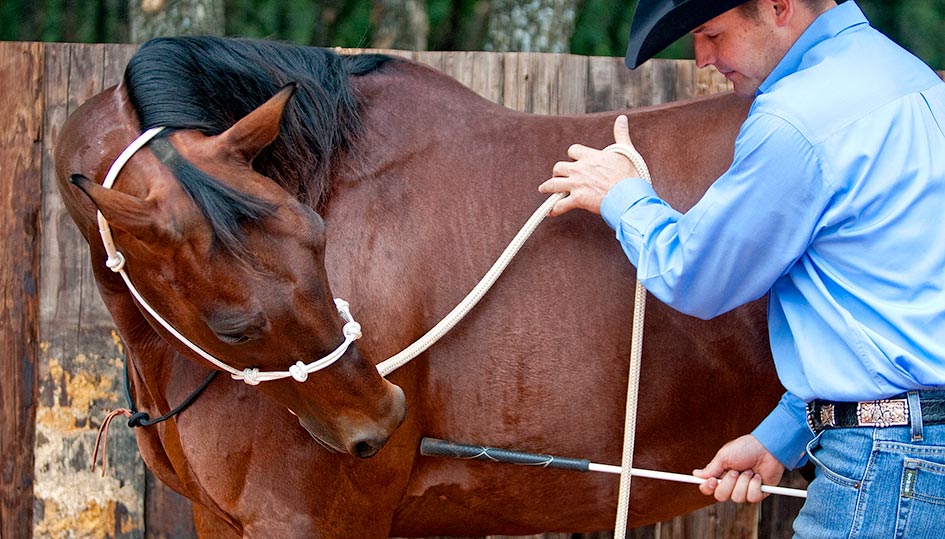
Flexing Stage Three: Poke and Flex
Stage Four: Flexing from the Opposite Side
Once a horse can flex really well, he’ll have a tendency to cheat. He’ll cheat in the fact that rather than softening to the halter pressure, he’ll just watch your hand and when he sees you reaching for the rope, he’ll automatically flex to his belly. It is a nice problem to have, because it means that the horse is thinking about being soft and trying hard, however, you want to be sure the horse is really soft. At this point, I will start to flex him from the opposite side, meaning that I will stand on the horse’s right side, but flex him to the left. By doing this, the horse is unable to see my hand coming, and it will test him to make sure he is softening to the halter pressure and not just watching my hand.
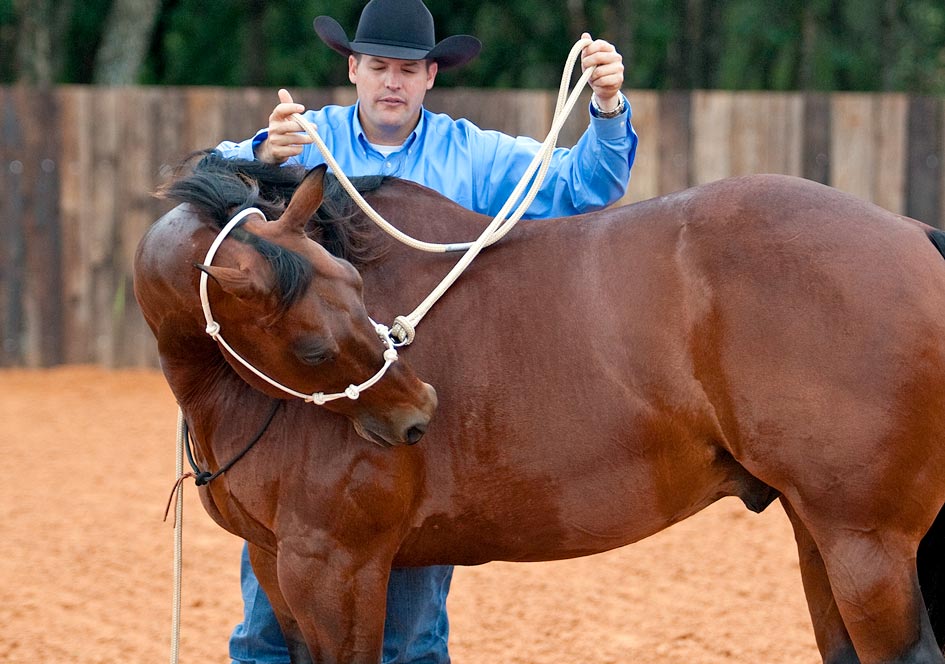
Flexing Stage Four: Flexing from the Opposite Side
A Nice Problem to Have
Often times through repetition, horses will keep their head bent to the side instead of putting it back out straight when you release the pressure. It’s what I call a nice problem to have. A stiff horse is like a spring – as soon as you release the pressure, he immediately snaps his head back straight. As the horse gets softer, he’ll start leaving his head bent, even after you release, because he’s thinking about being soft. If you need to, you can gently push his head back straight.

Want To Learn More? SIGN UP FOR OUR LOYALTY PROGRAM
Master your horsemanship training through Clinton’s step-by-step method videos by joining the No Worries Club today. Becoming a club member ensures you get VIP pricing on all of Clinton’s must-have training tools and resources. Plus, you’ll enjoy all the phenomenal benefits that come with club membership!


