
Right versus Wrong in Tying Up a Horse
When tying your horse up, safety should be your biggest concern. A horse that is tied incorrectly can get loose, and, depending on where he’s at, can seriously injure himself or others. Or, he can get caught up in the rope and get in a bad wreck.
My preferred method of tying a horse up around the ranch is to use a Patience Pole. My version of a Patience Pole is a 12-foot steel pole set in concrete 4 feet deep in the ground with 8 feet rising up perpendicular to the ground. At the top is a hub, and welded to that is a solid 3/4-inch tube that extends down about a foot and has a loop at the end for attaching the horse’s lead rope or a heavy-duty chain. The idea behind a Patience Pole is that if the horse walks around the pole, the hub spins around. So if a horse gets nervous and wants to move, he is more than welcome to move his feet, but instead of walking off, he just goes around in circles. After a while, the horse gets kind of tired and eventually defeats himself mentally—he realizes that no matter how much he moves, he’s never ever going to go anywhere, so he might as well stand still and relax.
Sign up for our loyalty program
Master your horsemanship training through Clinton’s step-by-step method videos by joining the No Worries Club today. Becoming a club member ensures you get VIP pricing on all of Clinton’s must-have training tools and resources. Plus, you’ll enjoy all the phenomenal benefits that come with club membership!

If you don’t have a Patience Pole, or if you’re in a situation where using a Patience Pole doesn’t make sense (in the trailer or away from home) I’d recommend using an Aussie Tie Ring. The Aussie Tie Ring is a great tool for teaching a horse how to stand tied because it, too, lets the horse move his feet. If he pulls back while tied up, as soon as he stops pulling, the tie ring gives him an instant relief of pressure. That causes the horse not to panic as much. When he’s using the reactive side of his brain, the more a horse pulls against pressure and can’t escape it, the more he wants to fight. When a horse pulls back and is actually able to move his feet, it’s as if he says to himself, ”There’s no reason to keep fighting because I’m able to move my feet. There’s no need to feel trapped and claustrophobic.” That’s why the Aussie Tie Ring is such a great tool.
In general, I prefer to use the Patience Pole because it allows the horse to move his feet while discouraging him from using the reactive side of his brain. The tie ring is designed more for horses with tying problems. If the horse pulls the lead rope through the tie ring, you have to be right there to adjust it. With a Patience Pole, you can tie the horse up and go about your business. Of course, no matter where or how your horse is tied, you should always keep an eye on him to ensure he’s safe.
If you don’t have either of those tools at your disposal, you can tie your horse up using a Bowline knot. It’s my favorite knot because the horse can’t untie himself, yet if he does pull back, it’s relatively easy to undo the knot because it doesn’t tighten up on itself.
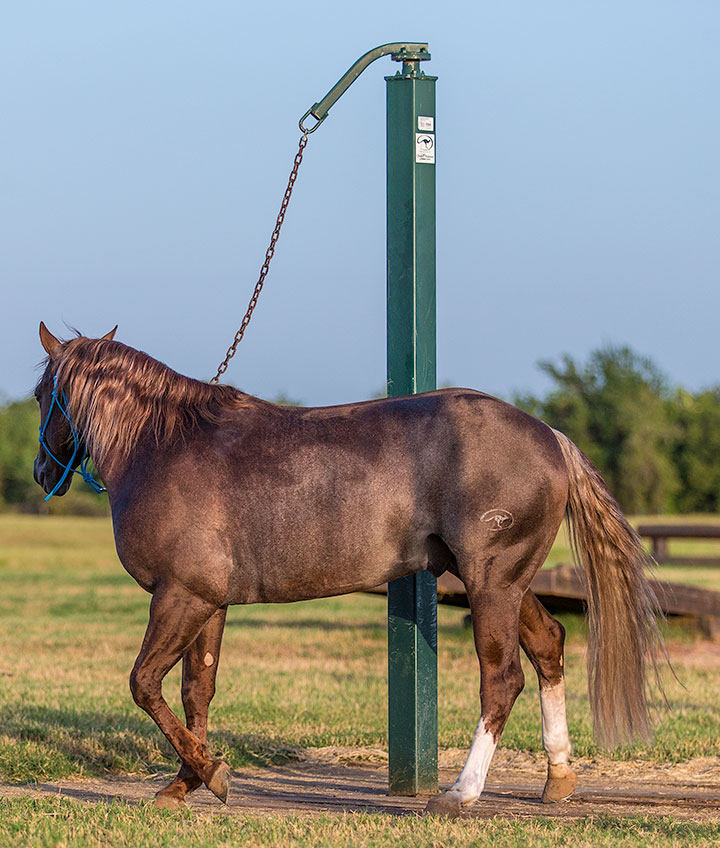
I love using Patience Poles because they allow the horse to move his feet. The number one reason why horses pull back and get reactive when tied up is because they feel trapped and claustrophobic.
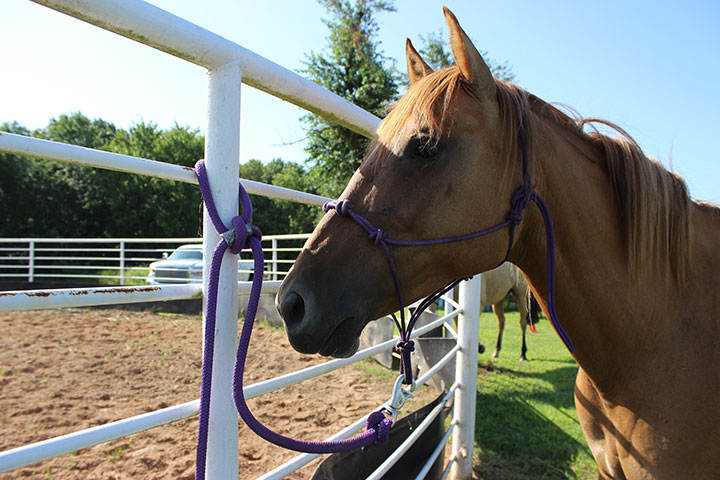
RIGHT
When a horse is tied correctly, he should be securely fastened to a safe, stable structure that won’t move if he does. The lead rope should be fastened so that there’s about a forearm’s length between the clip attached to the halter and where the lead rope is tied. It should be fastened at the horse’s eye level so that the tail of the rope is safely out of the horse’s way and he can stand comfortably.
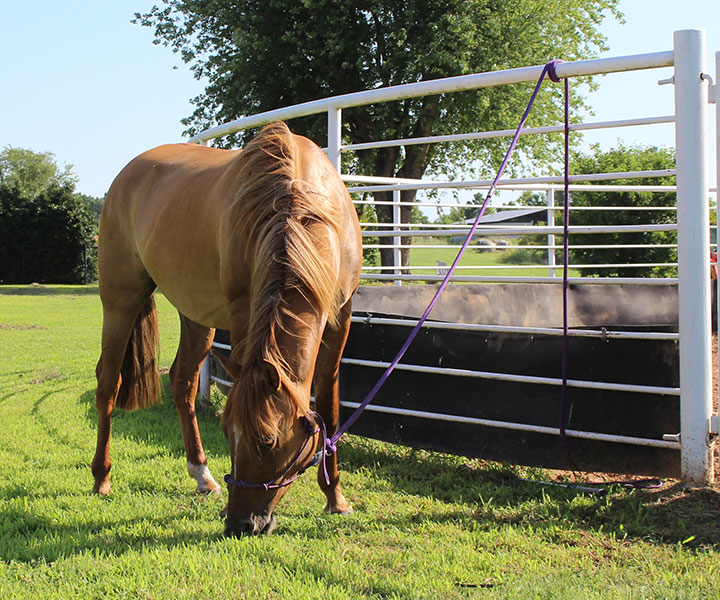
WRONG
The horse in this photo is tied too long and the lead rope isn’t securely fastened to the fence. When the lead rope isn’t tied up short and at the horse’s eye level, you risk the horse getting a leg hung up in the rope which can lead to a bad wreck. On top of that, it’s just bad horsemanship. When you tie your horse up, he should relax and stand quietly until you come and get him. Letting a horse eat grass and never teaching him how to be tied up is sloppy.
How to Tie a Bowline Knot
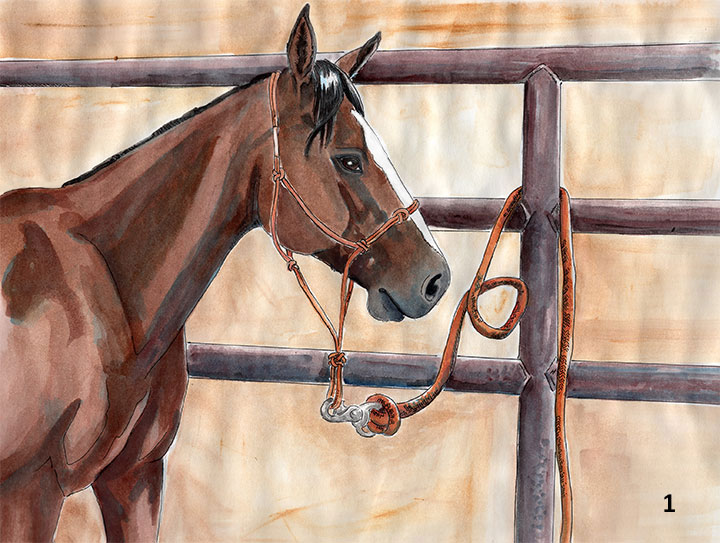
Illustration #1
Lay the lead rope across your left hand with the free end hanging down. Form a small loop in the line in your hand by taking the free end of the rope over, not under, the line in your hand. Then pass the free end of the rope behind the pole, or whatever you’re tying your horse to.

Illustration #2
Bring the free end up to and pass through the eye of the loop from the underside. (Think of a rabbit coming out of a hole.)
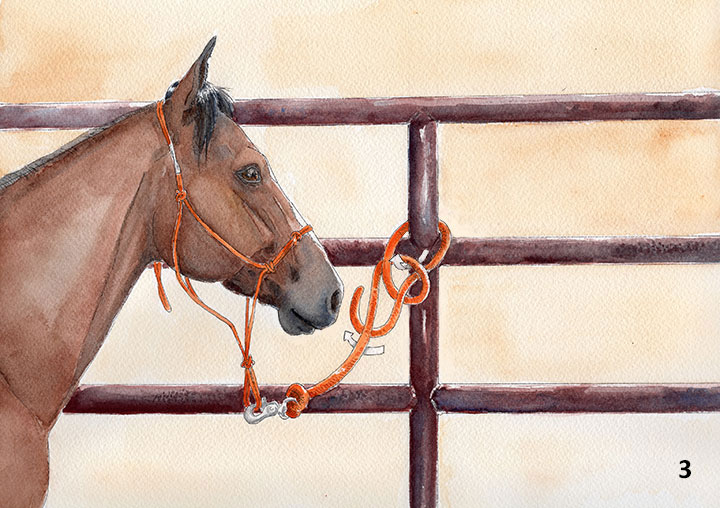
Illustration #3
Then pass the free end under the line attached to the horse.
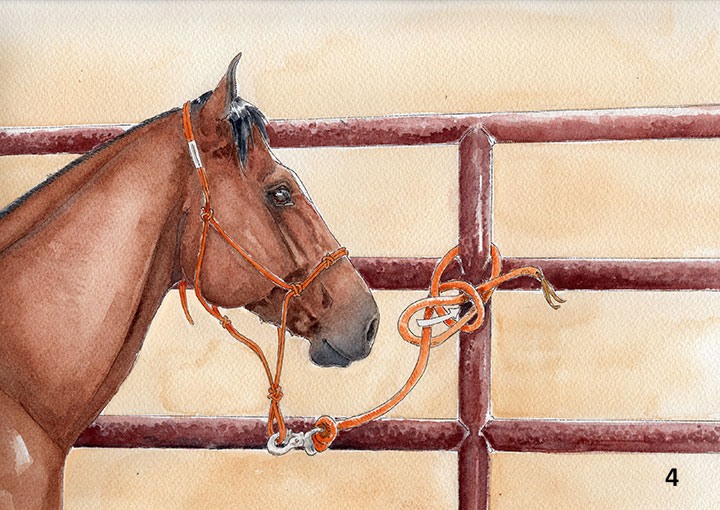
Illustration #4
Bring the free end of the rope up and pass it back through the loop. (Imagine the rabbit going around the tree and back down the hole.)

Illustration #5
Tighten the knot by pulling on the free end while holding the line attached to the horse.
Illustrations by Katie Trosclair
(NWC KTrosclair84)


Master Your horsemanship Skills
Like these tips? Join the No Worries Club and hone your skills with thousands of hours of Clinton’s easy, step-by-step method horse training videos.