
As you can imagine, getting your colt safely saddled at Road to the Horse is a bit stressful and a huge step forward in the competition. Because you’re in a timed event, you don’t have the luxury of taking all of the steps you’d normally take with a colt at home and you have to remind yourself to get the job done quickly, but safely.

If not done correctly, the first saddling can be one of the most dangerous times when starting a colt because you’re introducing a new object to him that moves and makes a noise. And not only are you introducing it to him, you’re also fastening it to his back. When a horse gets frightened, he can react very quickly, so you need to be aware of what he’s doing at all times and be sure that you’re in a safe position.
The secret to making the first saddling a success is once you start saddling the colt, be quick about it. Get the job done as smoothly as possible without wasting time. This is the textbook version of how a first saddling should go.
Teaching Stage
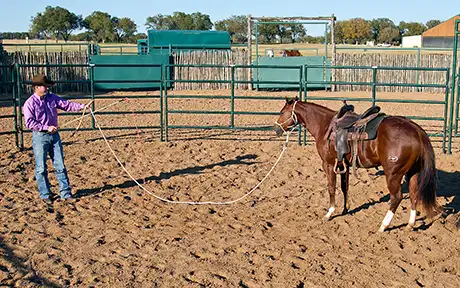
1 Make sure that you, the colt and the saddle are in the middle of the roundpen, giving yourself as much room as possible. Before starting to saddle the colt, toss the Handy Stick and String way out in front of the colt so that you know where it is.
Once you have the saddle on the colt’s back, you’re going to step back away from him to make sure you’re not in the way in case he starts reacting. Some colts take off bucking and snorting, which is OK, but you need to be prepared and have your tools handy to protect yourself. Oftentimes, when those colts take off, they run to you because they’re looking for safety. They’re not trying to run you over or be bad; they’re frightened and know from previous lessons that coming to you means safety. However, when a colt is bucking and trying to run away from the saddle, he’s extremely dangerous and can run you over or kick you in the head. Until he calms down, you’ll want to keep him away from you like the plague, and you’ll need your Handy Stick to protect your space. So before you even begin, place the Handy Stick out in front of you so you know where it is, preferably about 15 feet in front of the colt so that when you step back away from him, it’s within easy reach. What you don’t want to do is put the stick only a couple of feet in front of the colt because then you’ll have to put yourself in an extremely dangerous position in order to pick it up. By keeping it 15 feet in front of the colt, you’ll be able to back away from him and pick up the stick without ever taking your eyes off him.
2 The first three or four times you saddle the colt, do it from the offside (the colt’s right side).
It’s best to saddle the colt from his offside the first several times so that you only have to let go of the saddle once. Here’s how the saddling scenario would go if you saddled him from the left: You’d throw the saddle on, then you’d have to switch sides to let your cinches down on the right. Then you’d have to switch sides again to come back and do up the cinches on the left. By saddling him from the right, you can throw the saddle on and let down your cinches all at once. Then you only have to switch sides once, which will greatly decrease your chances of something going wrong.
3 Place the saddle pad on the colt’s back. Then use Approach and Retreat to let the colt smell the saddle.
Standing at a 45-degree angle on the right side of the colt, hold the saddle up and offer it to him to see if he would like to smell it. If he does, move the saddle away and then offer it to him again. This will just build his curiosity and confidence with the new piece of equipment.
4 Hold the lead rope in your right hand to keep the colt’s head tipped toward you. Lift the saddle up and down in the air beside him several times with rhythm. Then swing the saddle up over the colt’s back so that the stirrup flops onto the saddle pad. Do this a couple of times to warn the colt that the saddle is coming, and then just place the whole saddle on his back.
Before actually putting the saddle on the colt’s back, spend a few minutes using Approach and Retreat to lift the saddle up and down next to him. If the colt can’t stand still while you’re just lifting the saddle in the air next to him, he’s not going to accept it on his back. If you always prepare the colt for what you’re about to do, you’ll find he’ll accept the new piece of equipment so much better.
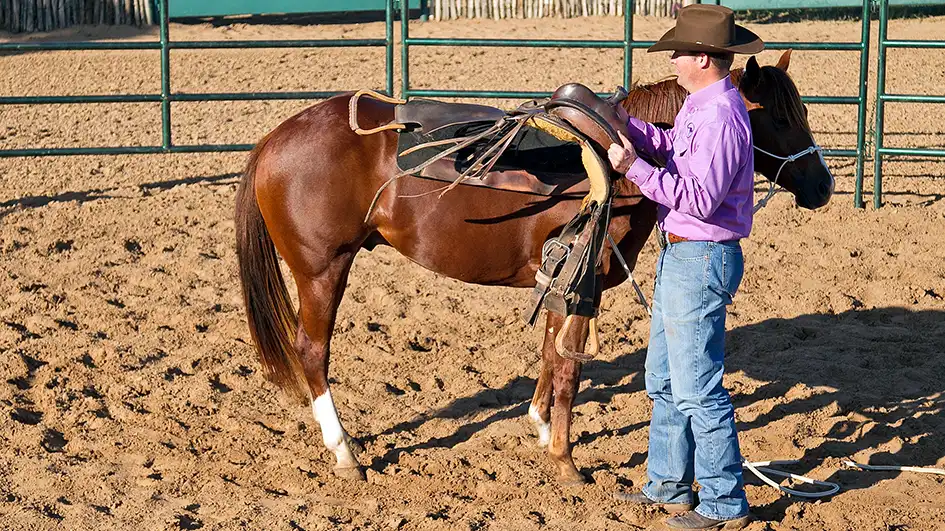
Use Approach and Retreat to move the saddle next to the horse before putting it on his back.
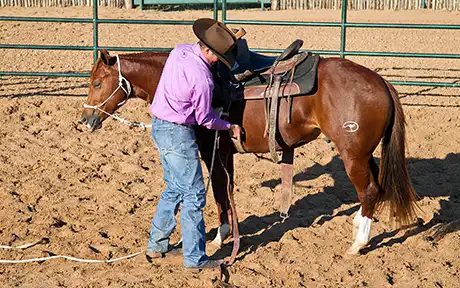
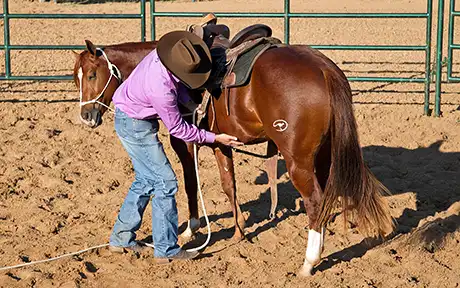
5 Once the saddle is on his back, keep his head tipped toward you and one hand on the saddle as you position the saddle and let the cinches down.
Position the saddle so it’s sitting correctly on the colt’s back. Try to keep one hand on it the entire time so that if the colt jumps or bolts, you can pull the saddle off his back, which is better than having him throw it off. The worst thing you can do when saddling a colt for the first time is acting sneaky—giving him a reason to believe he should be worried about the saddle. If the colt moves, just keep his head tipped toward you and stay with him. If he really goes to take off, pull the saddle off his back before he has a chance to buck it off. You don’t want him thinking he can get the saddle off by jumping away from it. That’s why it’s important to keep one hand on the saddle so that if the colt does move or jump away from you the saddle won’t fall. You want the colt to think the only way a saddle can come off his back is if you take it off.
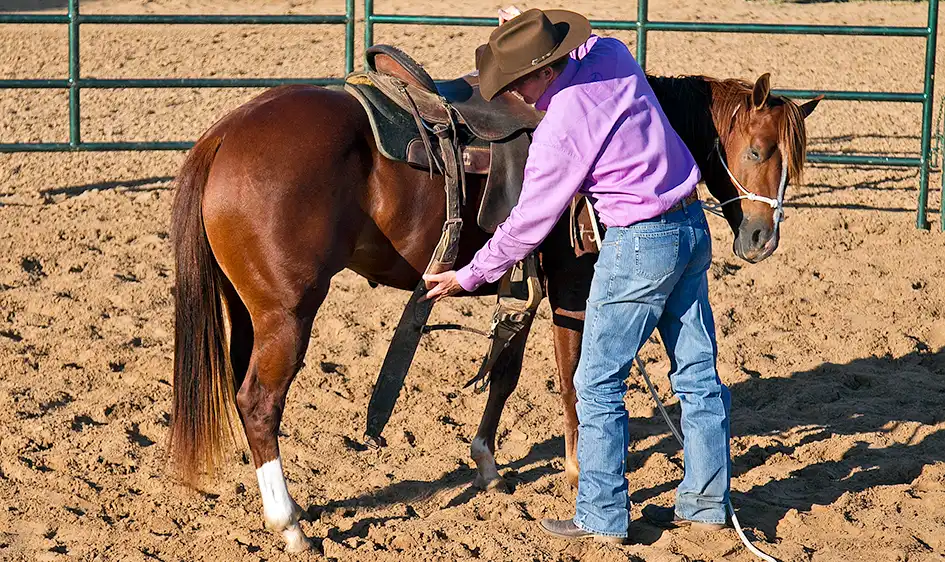
Prepare the colt for the cinches by pressing them against his side.
7 Then change sides quickly, but calmly. Get one hand back on the saddle as soon as you can and tip the colt’s head in your direction.
When you let go of the saddle you’re in a vulnerable position. If the colt would jump away from the saddle or spook, the saddle could come off. So you only want to have to change sides once, and when you do, do so quickly. But don’t act like you’re in a big rush or the colt will pick up on your nervous energy. As soon as you get to his left side, grab a hold of the saddle and get his head tipped in your direction.
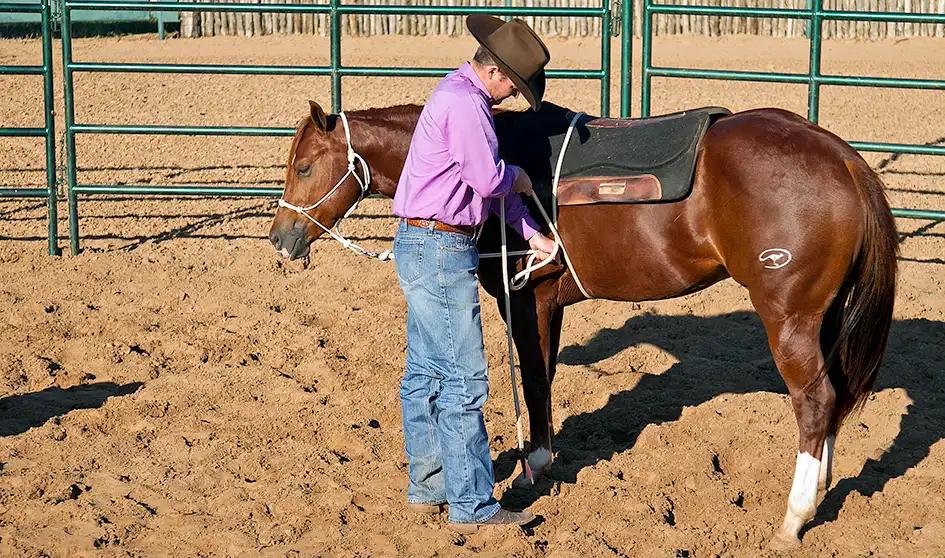
8 Hook the stirrup up on the horn so that it’s out of the way. Then rub your hand underneath the colt to warn him that the cinch is coming and pull the cinch up under his belly several times to prepare him for when you tighten it.
Pull and release on the cinch to double-check the colt is OK with the sensation. It’s like you’re warning him the cinch is coming. If he has an issue with it and moves his feet, bend his head more to put him in more of a bind and keep pulling and releasing the cinch until he stands still and relaxes. Don’t let him think he can get away from the pressure by moving his feet and using the reactive side of his brain.

Spend a few minutes pulling and releasing on the cinch to prepare the colt for the pressure he’s about to feel around his girth.
9 Thread the latigo through the ring once, and then pull and release on it so that it tightens under the colt’s belly.
This is the last time you’re going to be able to warn the colt before completely doing up the cinch. At this point, you’re not quite committed yet. If something would go wrong, you could still pull the saddle off if you needed to.
10 Fully do up the cinch so that it’s snug against the colt’s side. You want the cinch just snug enough so that if he bucks, it won’t come off.
Once you have the latigo through the ring a second time, you’re committed to saddling the colt. It’s sort of like the point of no return. If he went to jump away, you couldn’t easily get the saddle off his back, and if he really got to moving around, it could slip underneath him or he could buck it off. At this point, it’s important that you move quickly and get the job done. From this point on, your focus needs to be to get the cinches done up as quickly as possible because at any moment the colt could start bucking. However, it’s just as important to move smoothly. Don’t get in a hurry and just jerk the cinch up. If the colt is breathing heavily, try to time it so that you tighten the cinch when he exhales. Make sure the cinch is tight enough so that it won’t fall off if the colt reacts, but not so tight that it causes him to start bucking on the spot. Once you start moving him around, then you can tighten up the cinch again.
Do the cinch up so that it’s snug. It should be tight enough so that if the colt bucked, it wouldn’t come off.
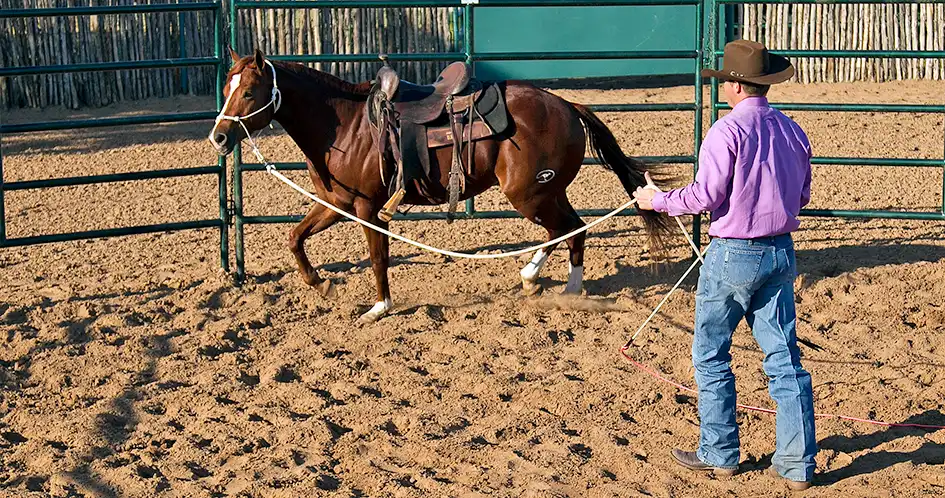
11 Once the front cinch is done up, rub underneath the colt’s belly and reach for the back cinch. Do the back cinch up so that it touches him, but doesn’t pull on him.
Make sure that when you’re doing up the back cinch, you’re still standing up by the colt’s shoulder. Never reach for the back cinch underneath the colt without letting him know you’re coming. If you take him by surprise, he’s likely to use the reactive side of his brain and kick out at you and then start bucking. So always warn him by rubbing underneath his belly first.
When done up correctly, the back cinch should be just touching the colt’s belly. A lot of people leave the back cinch so loose that there’s a 2- or 3-inch gap between it and the horse’s belly. That’s a good way to get bucked off or to get into a wreck if the horse kicks at a fly and gets his foot caught in the cinch. If you don’t do the cinch up so that it’s touching the colt’s belly, what’s likely to happen is he won’t feel the cinch underneath him and then when you ask him to canter or change directions, all of a sudden the cinch will touch him and he’ll take off bucking because he’s surprised by it. Stay safe by always doing the back cinch up correctly.
Then prepare him for the back cinch by rubbing underneath his belly and pressing the cinch against his flank.
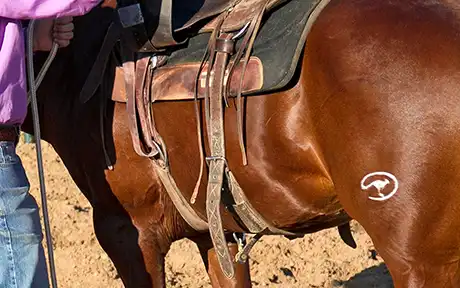
The back cinch should just be touching the colt.
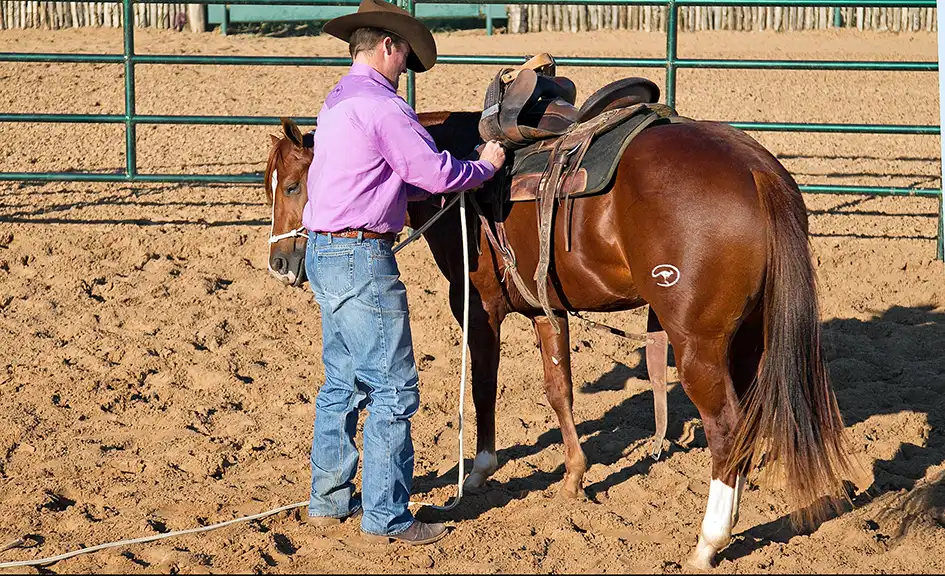
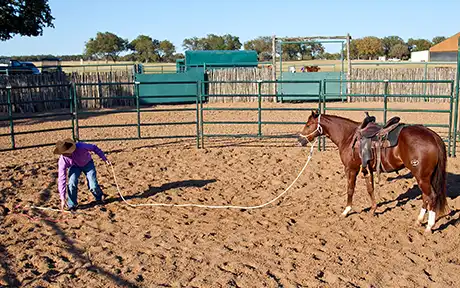
12 Drop the stirrup down gently against the colt’s side and step back away from him at an angle. Keeping your eyes on him the entire time, quickly pick up the Handy Stick and string, and then protect your space, if necessary. DO NOT LET THE COLT FOLLOW YOU. Wiggle the lead rope as you back away to keep him from stepping toward you.
If the colt steps toward you and then all of a sudden the cinches grab him, he’s likely to start bucking right over the top of you. If he does come bucking toward you or running to you, wave the lead rope and the Handy Stick to keep him away. Protect your space. Remember, a horse can’t hurt you as long as he’s not in your personal hula hoop space. Until he proves to you that he’s not scared of the saddle on his back, you’re not going to let him come near you.
13 Get to the center of the roundpen, and then ask the colt to trot around you. If he bucks, let him. Just keep his feet moving. At this point, you’re not going to do a lot of changing of direction, you’re just letting the horse trot around and get used to the feeling of the saddle.
I would say that 50 percent of horses will buck with the saddle and 50 percent won’t. The first time I saddle a horse, he’s allowed to buck. As soon as I get the saddle on him, I’ll just get him going around and let him just get used to wearing the saddle. A lot of horses will stand calmly while you do up the cinches, but once they start moving and feel the cinch around their girth area, they come unglued. If the colt is going to buck, I want him to buck as hard as he possibly can to try to get the saddle off his back. He needs to realize that he can buck as hard as he wants, but he’s not going to get rid of the saddle or the pressure around his girth.
However, the second time I saddle him, and each time after that, he’s never allowed to buck again. I’ll still get his feet moving around, but anytime he bucks, I’ll redirect his feet by yielding his hindquarters or stepping in front of him and sending him off in a new direction. The first time’s on me, but after that, if he tries to buck, I’ll redirect his feet. That’s why it’s so important to establish a solid foundation of groundwork with the colt before introducing the saddle. As long as you can control his feet, you’ll be able to keep yourself safe and be able to stop any unwanted behaviors such as bucking.
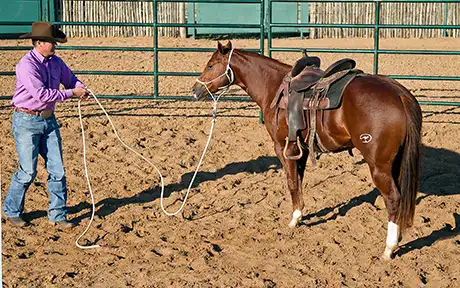
When the saddle is on the colt, back away from him while protecting your space. Treat him as if he’s a loaded gun about to go off.
Send the colt around the roundpen and let him get used to wearing the saddle.
14 Let the colt trot around the roundpen a few times, and then yield his hindquarters to bring him to a stop so that you can tighten up the front cinch. Remember to leave your stick and string way out in front of the colt. Approach the colt at a 45-degree angle to his shoulder and keep his head tipped toward you as you tighten the cinch up.
I make a habit of tightening the cinch up three times. When I first saddle the horse, I’ll do the cinch up so that it’s just snug. After moving the colt around I’ll tighten it up again. Then I’ll do a little bit more groundwork and tighten it up a third time. When I tighten it up this last time, I’ll get it pretty darn tight, like how I would normally tighten the cinch on a broke horse. When you eventually ride the colt, that’ll stop him from sucking his belly up and fooling you into thinking that you have the cinch snug when in reality it’s loose. A lot of people will only do the cinch up once as tight as they can, and while it might be tight when they first get in the saddle, it gradually loosens up as they ride the horse. Then they find themselves in a wreck when the saddle slips underneath the horse’s belly. To save myself from getting into a wreck, I’d rather have the cinch a little too tight than a little too loose. Don’t ever put the saddle on and do the cinch up as tight as you can from the beginning, because that’s how horses become cinchy. Always do it up in stages.
I tighten the colt’s cinch three times so that the saddle is securely in place.
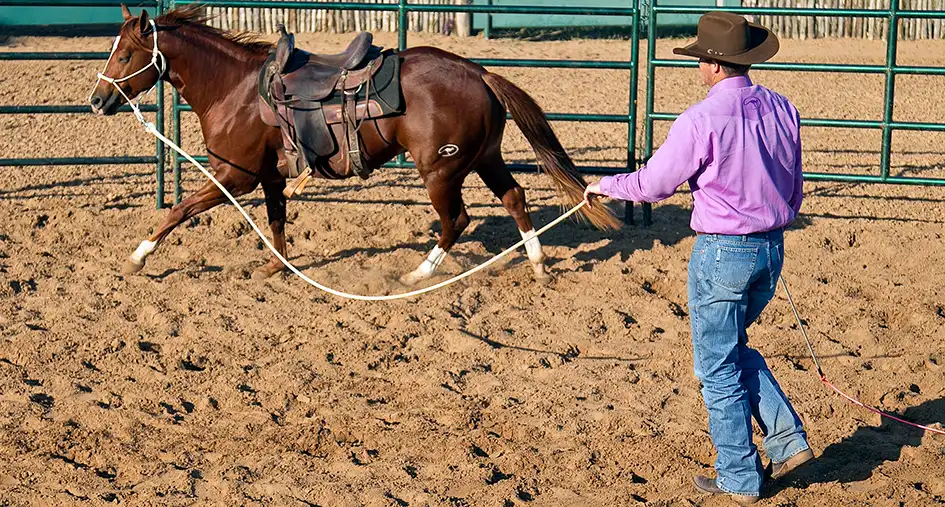
15 Back away from the colt, pick up your stick and string, and send him off again. Ask him to trot a few circles, then ask him to canter.
It’s very important to get the colt cantering. When he canters, the stirrups will bump against his sides, the saddle will move on his back, and the cinches will pull on him in different ways than at the trot. Some colts will be fine at the trot, but as soon as you ask them to canter, they’ll start bucking. Don’t worry about trying to make the colt lunge a perfect circle; just hold the end of the lead rope and let him follow the outside of the roundpen. Run a little bit yourself if you have to in order to give him enough room to canter.
16 Then switch directions and ask him to trot and canter in the other direction.
Remember, new side/new brain. Just because the colt acted one way going in the first direction doesn’t mean he’ll act the same on the new side of his body. Be prepared.
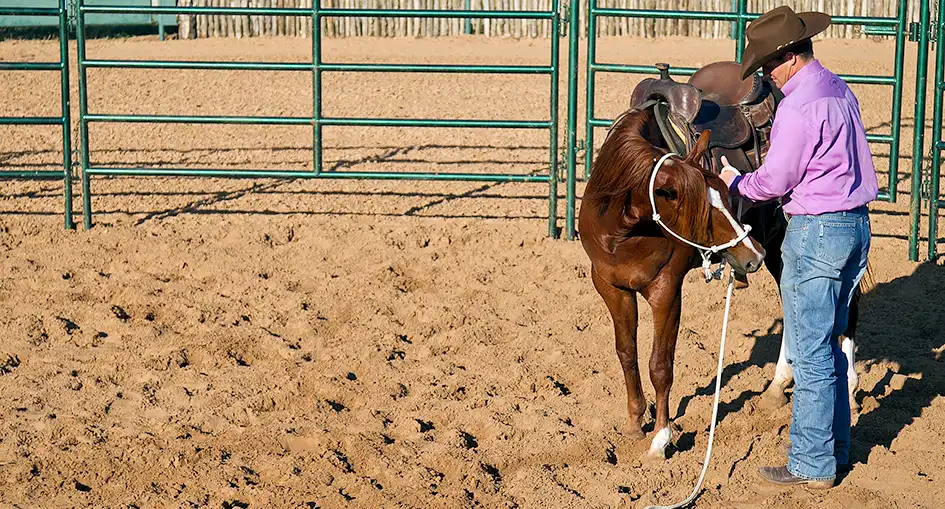
17 When the colt is moving around the circle relaxed, yield his hindquarters to bring him to a stop and tighten the front cinch up for the third and final time.
When you tighten up the cinch, be sure the colt’s head is tipped toward you.
When the colt is comfortable with trotting, ask him to canter.
18 At this point, the best thing to do with the colt is turn him out in a big, safe arena and just let him get used to wearing the saddle. Unless you’re worried about catching the colt, take the halter off of him.
The key to successfully saddling a horse for the first time is to get his feet moving forward and to give him time to get comfortable wearing the saddle. After you’ve worked the colt, keep the saddle on him and turn him out in the arena or another safe area to let him wear the saddle for six to eight hours. You have to turn him out in an area that’s fairly large so that he has room to move his feet. A roundpen is too small. What usually happens is the colt will run around bucking and then he’ll settle down. Then all of a sudden the stirrup will touch his side and he’ll take off bucking again. Then he’ll relax and fall asleep, and when he wakes up he’ll see the saddle on his back and take off snorting and bucking again. You’ve got to give him the opportunity to try and get rid of the saddle and realize he can’t. If all of a sudden the colt grew a mane and tail, he’d be just as frightened of them. But because he was born with his mane and tail and has had his whole life to get used to them, he’s not frightened of them. You have to let him wear the saddle long enough so that it just becomes second nature to him.
The worst thing you can do is saddle a colt up and then take the saddle straight off. You never want to take the saddle off until he is absolutely convinced that he can’t get rid of it and that it’s not going to harm him. If you come back after eight hours and he’s still snorting and bucking with the saddle, leave it on him all night. Put some hay and water out in the arena and leave him alone. If he’s really frightened of the saddle, you may have to keep it on him for two days. Do what you have to do to get the job done. The secret is to not take the saddle off until the colt is ignoring it.
A big key to getting the colt used to the saddle is making sure that he moves around with it a lot. It won’t work if he just stands in a corner of the arena all day because then he never gets to feel it moving around on him. When we start all our colts in the spring, I like to saddle them in groups. We’ll saddle all the colts and turn them out together in one arena. Then we’ll saddle all the fillies and turn them out together in another arena. That way, they keep each other moving around all day long. If I have to saddle one horse by himself, I’ll turn him out in an arena that I know people will be riding in all day. That way, if someone is riding around and notices the colt just standing in a corner, they can go chase him around a little. I can’t stress the importance of making sure the colt moves around during the day. If he doesn’t, it will defeat the whole purpose of turning him out.

The key to successfully saddling a colt for the first time is to get his feet moving and to let him get comfortable wearing the saddle.
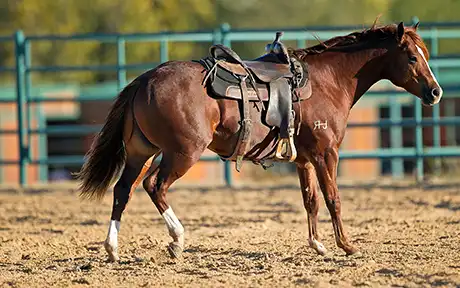
The colt will go through a process of running around, standing still and falling asleep, waking up and realizing the saddle is on his back and running around again.
We take many steps to prepare a colt for his first saddling, including introducing pressure around his girth and flank, where the cinches will rest.
Preparation is Key
This article is a step-by-step guide about how to safely saddle your horse. There are many steps we take to properly prepare a colt for the experience, which of course starts with gaining control of his feet and includes exercises that prepare him for feeling pressure around his girth and flank, where the cinches will be, and desensitizing to the saddle pad. With any horse, but especially with a colt, you can never do too much preparation.


Master Your horsemanship Skills
Like these tips? Join the No Worries Club and hone your skills with thousands of hours of Clinton’s easy, step-by-step method horse training videos.